Blender Cloud
I started using Blender scenes from the Blender Cloud. The intention behind that is
- to remind people to support the Blender Institute
- to use more and more realistic scenes for my render tests
- to make my multi exporter more stable and production ready
- because the scenes and textures being used are getting too big to be stored via git
- I’m probably going to retire the repository for my test scenes
- that I will provide download links instead
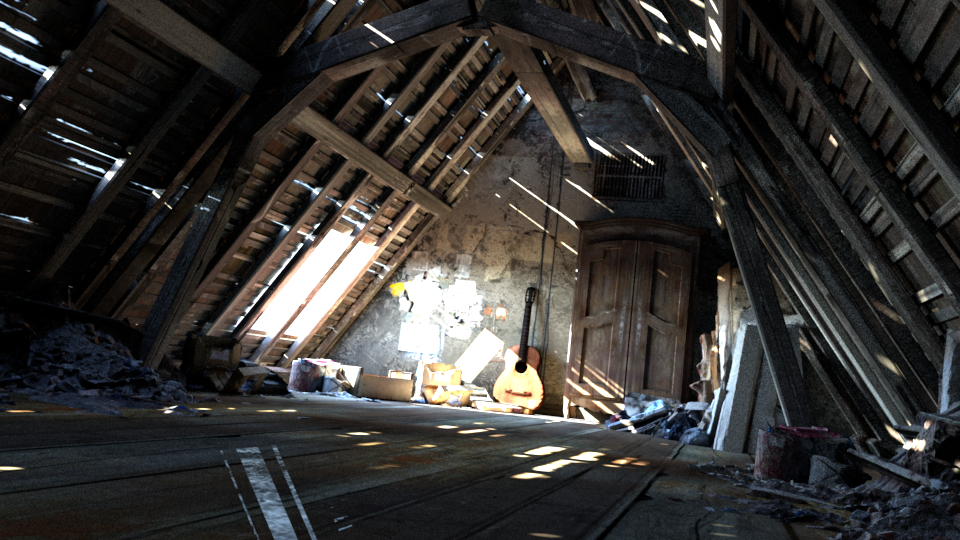
This scene in particular was modelled by Gleb Alexandrov, the author of the Creative Shrimp blog.
Cycles
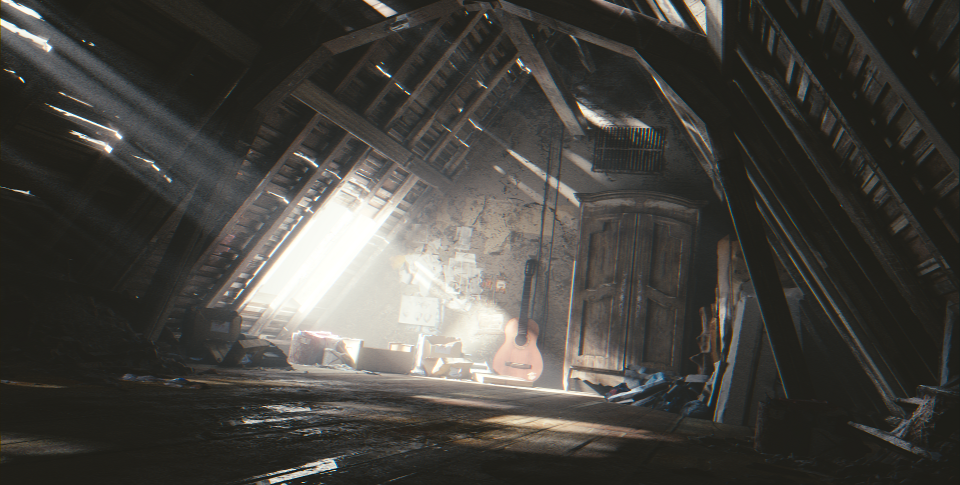
Cycles was used to render the original scene from the Blender Cloud and uses volumetric effects like scatter and absorption. If you click on the Attic link in the download section you will be able to get two Blender files from the cloud. One with, one without the fog. I modified the scene slightly to work with my multi exporter and if you click on the Cycles link (in the download section) you will be able to download the modified scene. The main difference is to simplify the material node network to use simple materials, like pure diffuse, a mix of diffuse and glossy, or a mix of diffuse and transparent. In the future I might add other combinations, but texturing (as required by the scene) is supported.
Radiance
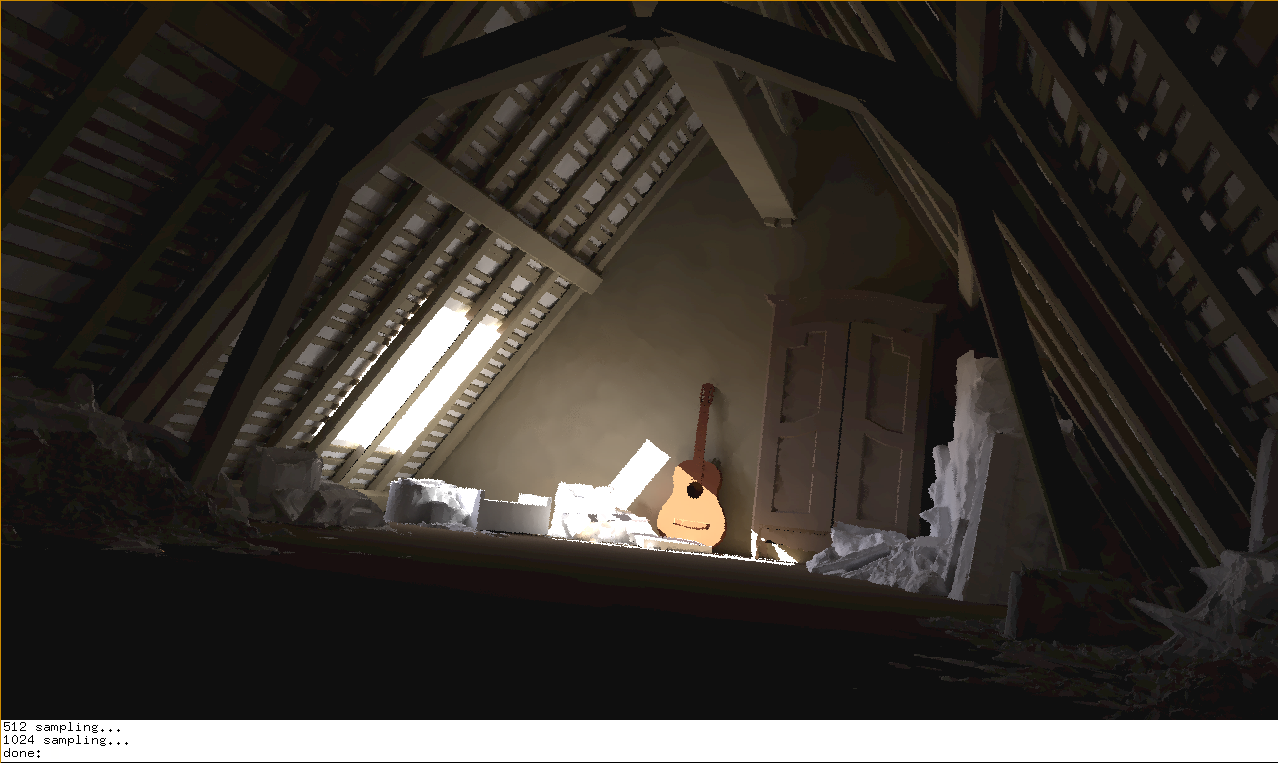
The current state of the Radiance exporter doesn’t support textures (yet), but I still like to use the renderer to see the light distribution within the un-textured scene and to analyze it, e.g. by using falsecolor option:
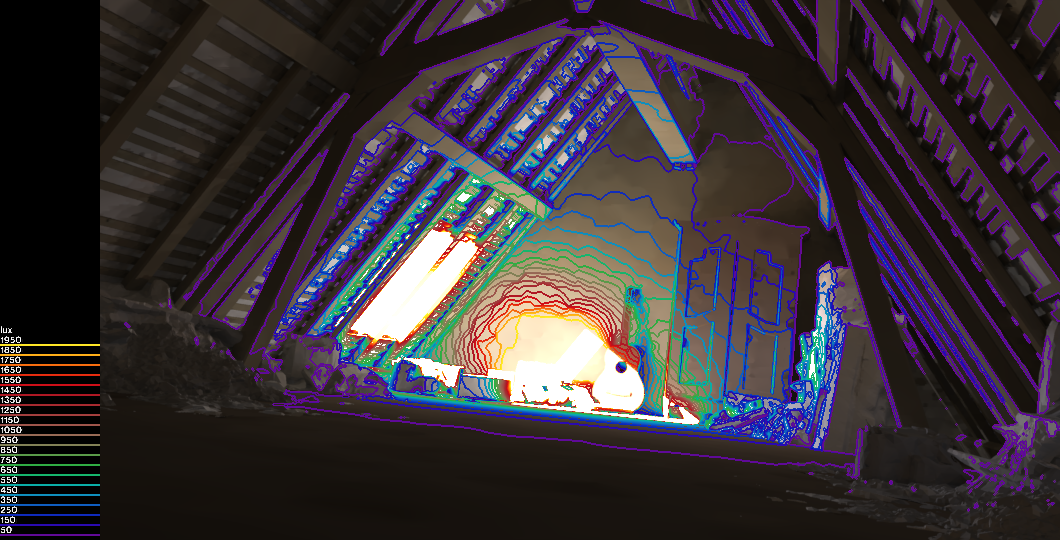
Here are the commands I used to render two images with Radiance and mix them to visualize the amount of Lux arriving at different parts of the scene via falsecolor contours:
rad -n attic.rif > attic.sh
sh attic.sh
rpict -vp 3.4038350582122803 1.1545137166976929 -0.8958941102027893 -vd -0.9505669474601746 -0.28570425510406494 0.1216370165348053 -vu 0.14788036048412323 -0.07206873595714569 0.9863760471343994 -vh 59.48976259388444 -vv 35.63777782904556 -x 2880 -y 1620 -dp 2048 -ar 39 -ms 0.13 -ds .2 -dt .05 -dc .75 -dr 3 -ss 16 -st .01 -ab 2 -af attic.amb -aa .1 -ad 1536 -as 768 -av 0.01 0.01 0.01 -lr 12 -lw 1e-5 -ps 5 -pt .04 -i attic.oct > attic_1_irr.unf
pfilt -m .25 -x /3 -y /3 attic_1_irr.unf > attic_1_irr.hdr
falsecolor -i attic_1_irr.hdr -p attic_1.hdr -cl -n 20 -s 2000 -l lux > attic_lux.hdr
ra_tiff attic_lux.hdr attic_lux.tiff
imf_copy attic_lux.tiff attic_lux.png
The details about this procedure are explained in a previous blog post.
Luxrender
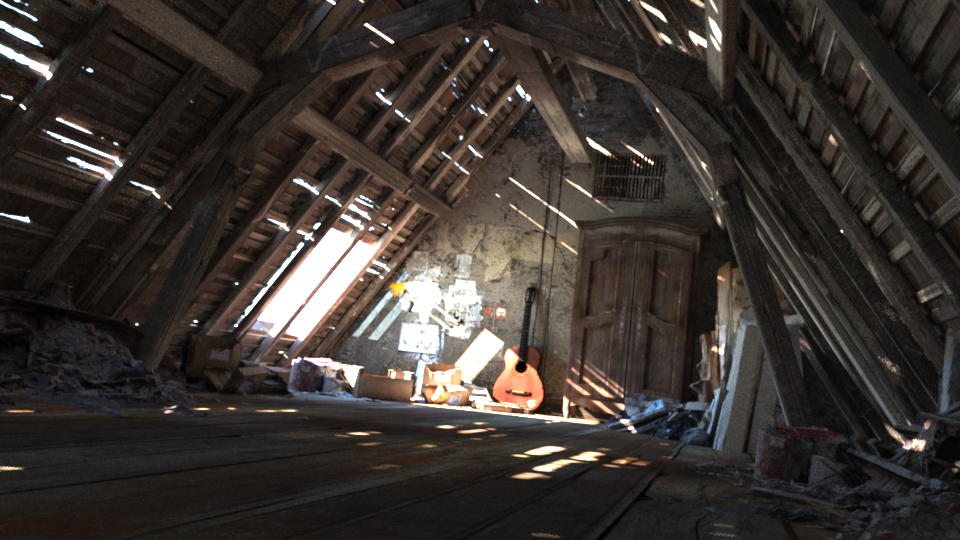
As you might have noticed the Radiance rendering doesn’t show the holes in the roof as in the original scene. The reason for that is the missing support for textures, because the holes are basically created by a mix of a diffuse with a transparent material, controlled by a texture to indicate the transparency. The Luxrender rendering shows those holes, but I used a slighly different texture (and uv-coordinates) in comparison to the original scene. In the future I might add fog for those renderers which support volumes. See Haunted Hallway - Luxrender and PRMan scene.
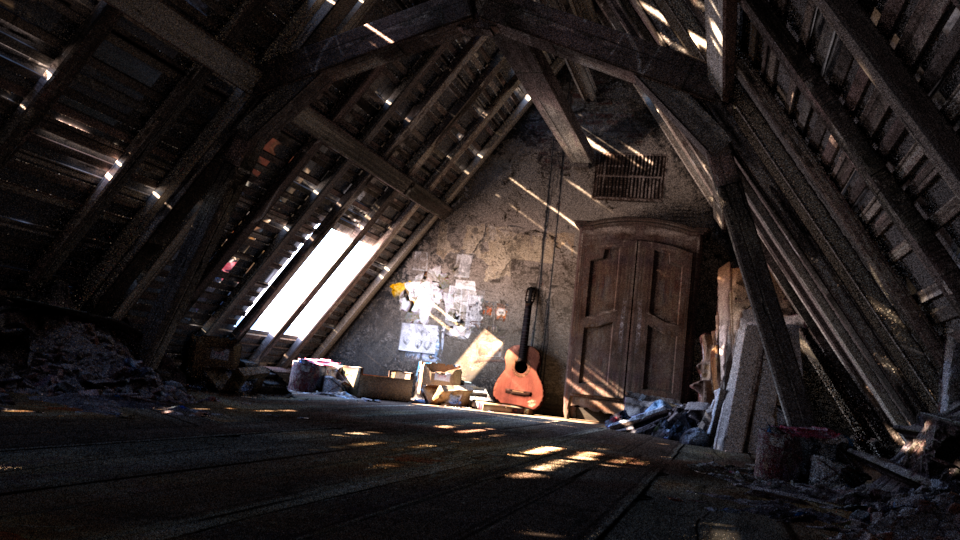
Arnold
With some manual tweaking of Arnold’s render options you can achieve rendering times around 2 hours. The already tweaked Arnold scene description can be found here. There is also one single shader (alLayer from alShaders) included (compiled for Arnold version 4.2.14.1 on Linux) which is used to mix two standard shaders.
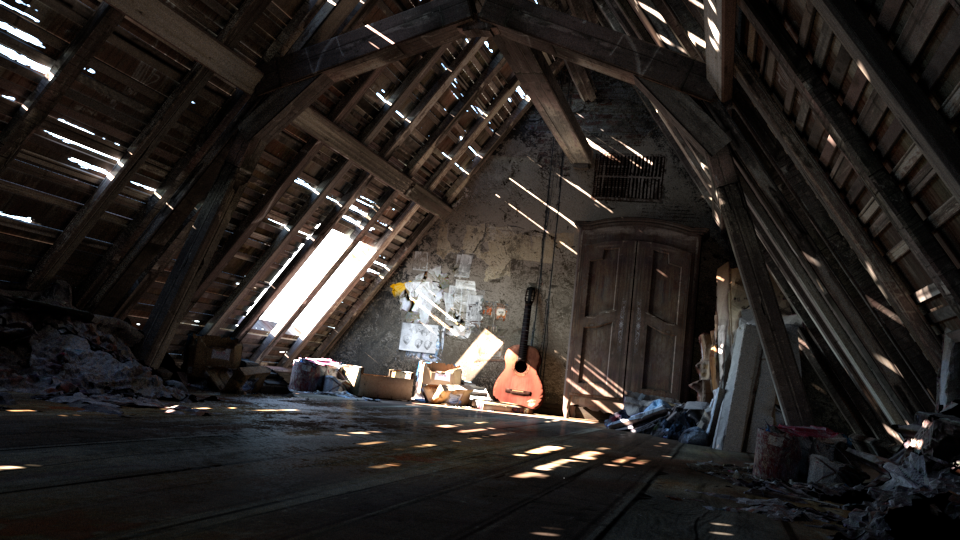
RenderMan
The image above was rendered by Pixar’s PhotoRealistic RenderMan (version 20.9), also in approximately 2 hours. The RIB file including special versions of the textures (being created by txmake) can be downloaded from here.
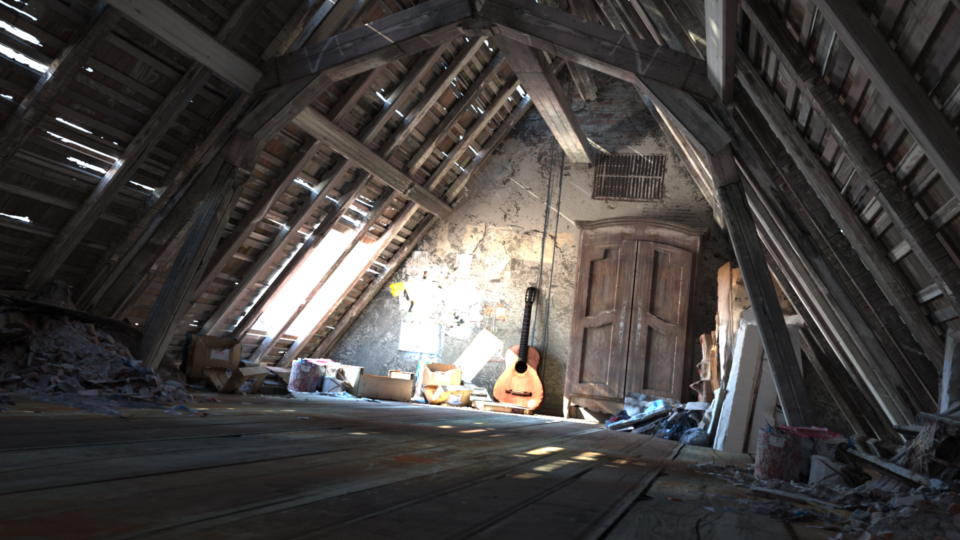
Guerilla Render
I did send Cyril Corvazier from Guerilla Render a Maya 2014 scene (which I imported into Maya via my own translator, which can read Arnold’s .ass files) and he prepared the scene to render with Guerilla Render. The scene can be downloaded from their samples gallery as well as from my download section. The resulting image can be seen above.
Indigo
The image above was rendered by Indigo and a .pigs (__P__ackaged __I__ndi__g__o Renderer __S__cene File) version of the scene (including all textures) can be downloaded from my download section.
