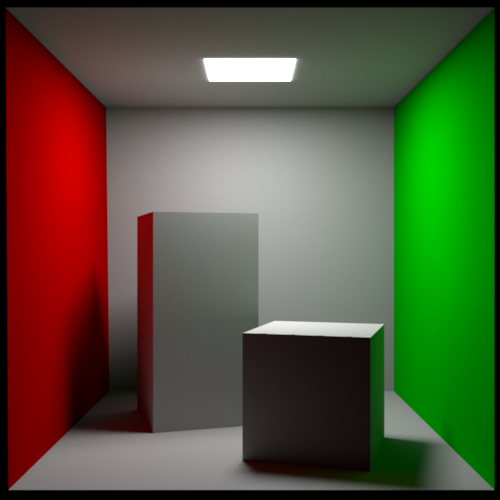
I already talked about this scene in a previous post. Today I would like to mention a tutorial, written by Patrik S. Hadorn a couple of days ago. To play around with a simple scene and the statistics given by Pixar’s RenderMan I have choosen the Cornell Box scene, which I already provide as a Blender scene in the download section.
Blender Addon
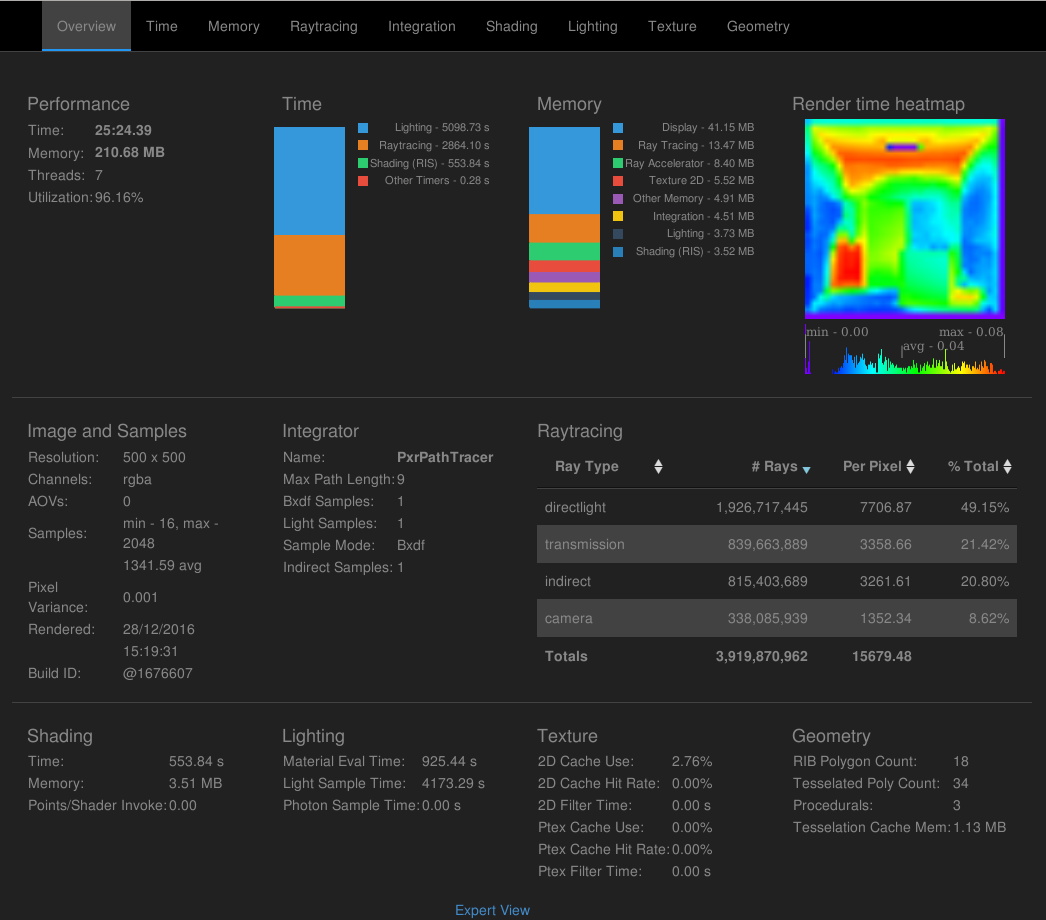
Basically the scene is setup for Blender’s internal renderer, called Cycles. Pixar itself provides a Blender addon and you can read more about it on their forum RenderMan for Blender (the link should work once you registered and are logged in).
The Blender scene mentioned above can be loaded into Blender and after you installed the addon you should be able to render with RenderMan. As far as I remember I created a world (while Cycles was still active), and gave it a black background color before switching to RenderMan. Make sure the world settings remain black after switching the renderers. Then you can select e.g. the Cornell Box (which has three materials on one mesh), select the material tab, and press the button labeled with Convert All Cycles to Renderman. After that you should be able to render with RenderMan. Just to make sure that all the settings are the same I provide a special version of the scene, which assumes that you have a working addon installed, that it can find the renderer, and that you got a license for RenderMan. You can install the non-commercial version to get started. Once you press the render button you have to wait until the renderer is done, but you will see the image before and can follow the progress while it’s rendering. The final statistics are available as an XML file which should look like this: