Imagine you want to create a short movie without any animation (except the moving camera). I believe you call it a fly-through. One of the challenges for a global illumination renderer is to bring the rendering time for interiors down to a realistic value. Normally the exterior can be rendered fast during daytime because the only light source (or at least the main light source) is the sun and the sky.
So, let’s create a simple fly-through scene, a house with 5 windows and a door, the sun and sky simulation, and an animated camera and it’s target (to define where to look at):
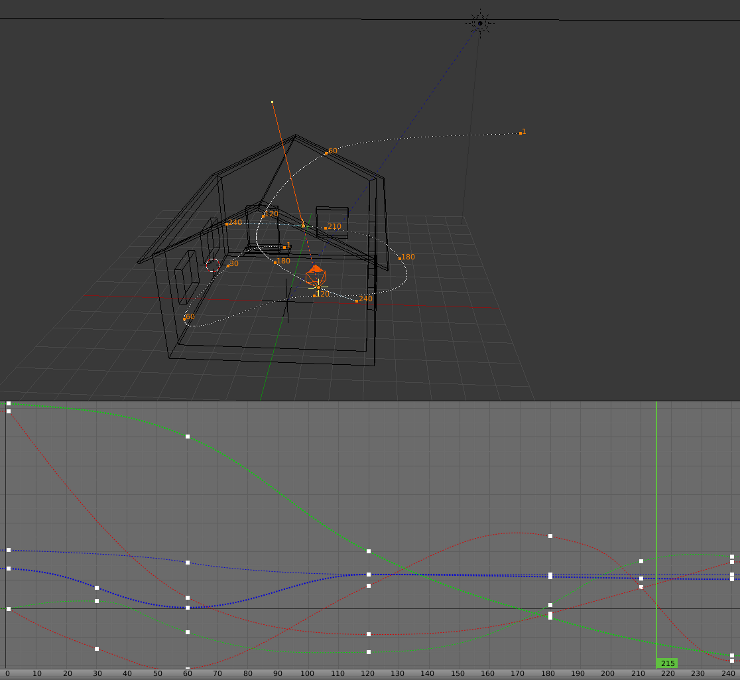
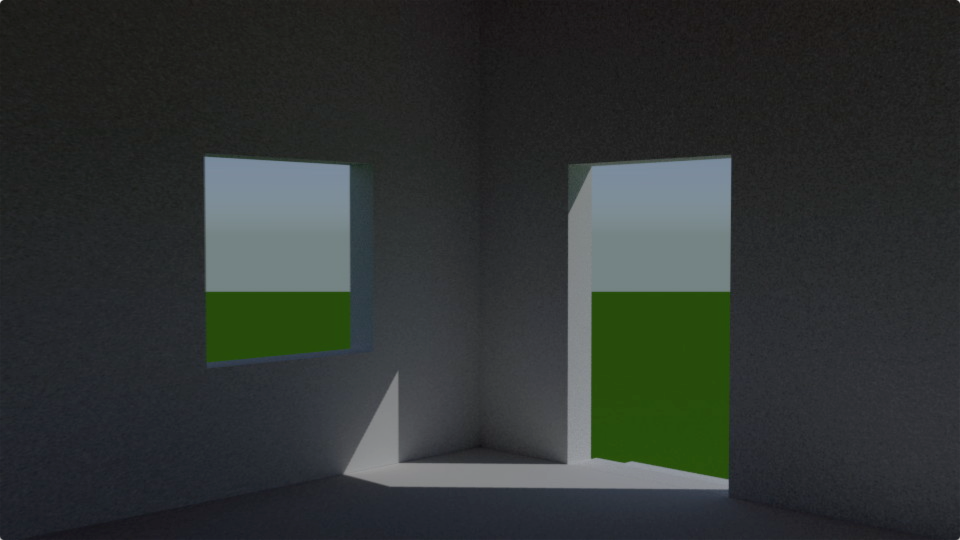
You can see in the screenshot above that the camera is moved from outside into the house within the first 5 seconds (120 frames of a 24 fps animation). The remaining 5 seconds it is moving inside the house from the door to the south-east corner. To control where the camera is looking at we use a target object which is animated in a circular way, so that the camera looks at the door while outside and circles around in the room while moving inside the house. Because the movement of the camera and the rotation around the z-axis (z is up in Blender) happens relatively fast, we should consider using camera motion blur. So here is a still frame (215 out of 240 frames) where the camera is pretty much at the end of the rotation and is aiming for the door and one of the windows:

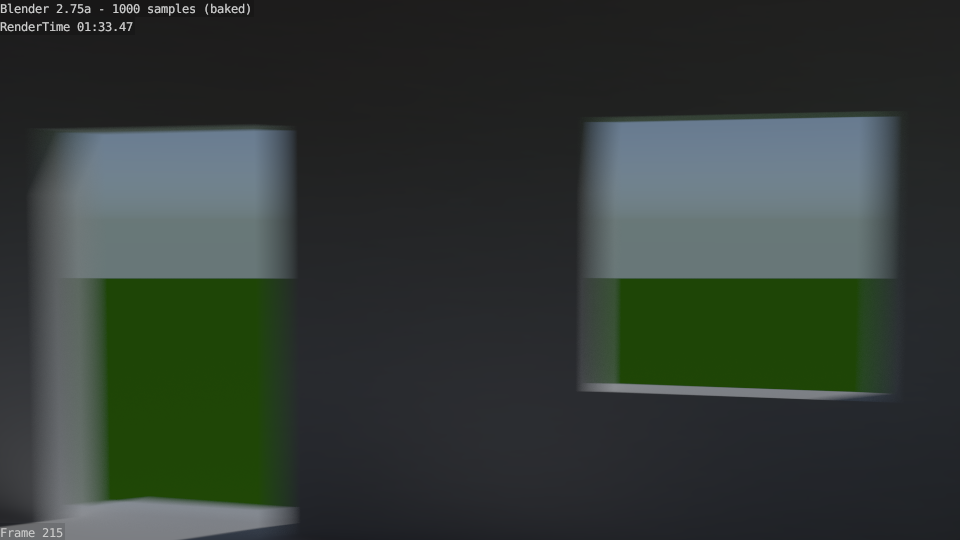
You can clearly see the motion blur around the edges of the door opening and the window. What we want to focus at are the dark areas (where we get light only from bouncing sun light or from the sky) inside the room, it’s noise level and the rendering times. In this case we instructed Cycles (Blender’s internal global illumination renderer) to use one hundred samples per pixel (per frame). The rendering time for this frame is around 35 seconds.
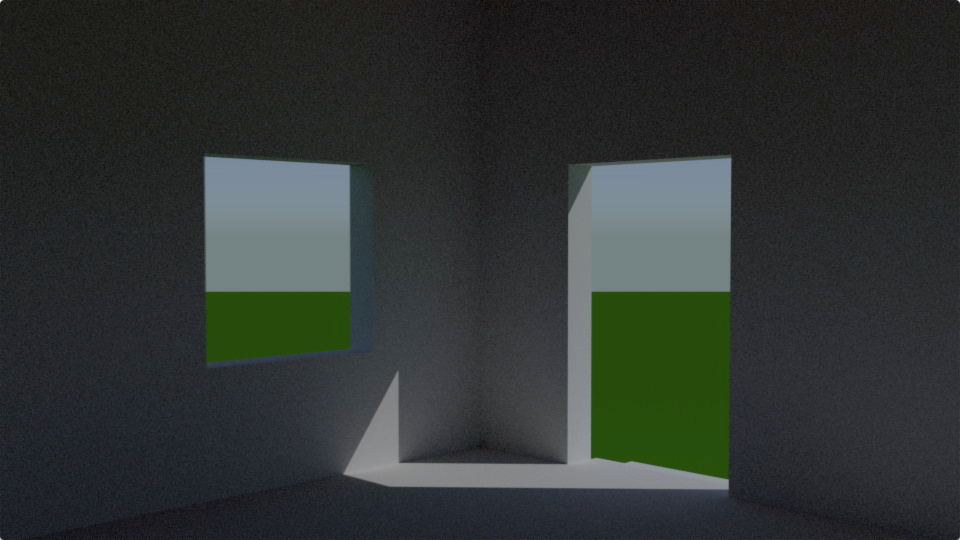
To achieve a better quality (a lower noise level) we have to trade for a higher rendering time:

One thousand samples per pixel (per frame) gives us a rendering time of about 5 minutes and 49 seconds.
So, let’s talk about the effect of baking first, before I describe what baking actually means.
Here is a one hundred samples per pixel (per frame) rendering of the same frame using baked textures to accelerate rendering:

The rendering time goes down from 35 seconds to about 10 seconds.
Even if we use one thousand samples per pixel (per frame) the rendering time goes down (from 5 minutes and 49 seconds to approximately one minute and 34 seconds).
But you hardly see any improvement for the dark areas inside the room. Only the brighter edges along the entry and the window show less noise, but they are noisy anyway due to motion blur.
So what exactly is baking doing?
Well, similar to game engines, it’s creating textures which can be used to play back the fly-through animation in real-time. As you can see in the OpenGL screenshot (rendering) below, I only created uv-coordinates for the floor and the inner wall polygons:
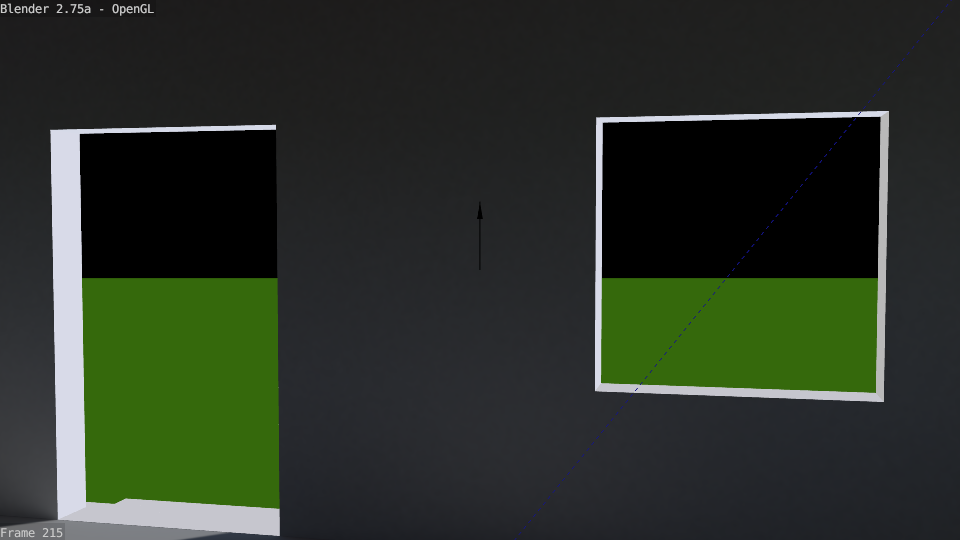
The outside, in this case only a green ground plane and a sky from the sun & sky simulation (visible only in the images rendered by Cycles), and the polygons at the rim of the openings are still using full global illumination calculations while being rendered with Cycles, but the interior walls can benefit from the baked textures, as you saw looking at the resulting rendering times.
So, how can you create those baked textures from within Blender?
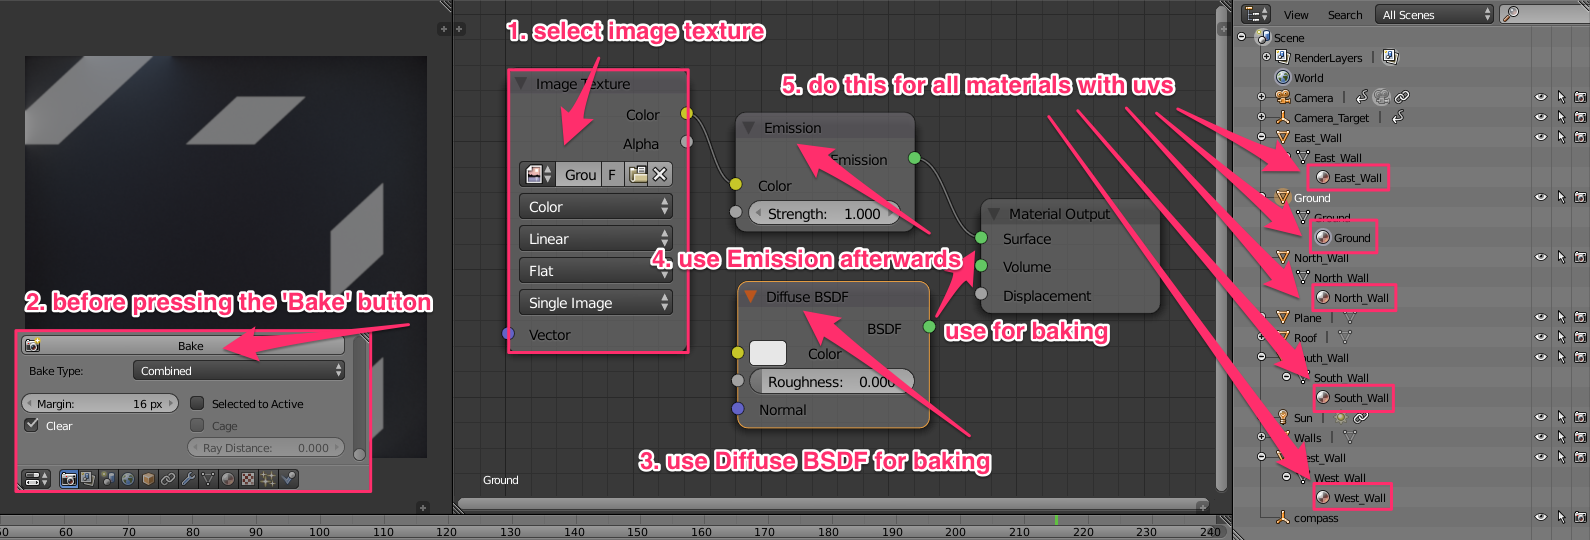
Each inner wall polygon needs texture coordinates. The materials being used on those polygons are pure diffuse for baking, and will use a textured emission material once we baked the global illumination into textures.
In the screenshot above you see one of the Image Texture nodes, which have to be selected in the Node Editor for baking. Be aware that you have to link the Diffuse BSDF output to the Material Output node via the Surface slot before you should press the Bake button.
You have to repeat the baking process for each material (ground polygons and each inner wall polygons), therefore you will bake five textures in this scene.
Once you have done this you can re-connect the Emission nodes to the Material Output nodes and play back the animation in real-time in the viewport. You can also render the whole animation using the baked textures with Cycles and use the Video Sequence Editor to combine the individual images for each frame into a single movie file.
One thing I haven’t talked about (yet) is that you might want to post-process the baked textures before you use them.
Here is the last frame for an animation using 1k textures (1024x1024 pixels). Click on the image to see the movie on YouTube:
For convenience you can also download the original AVI file from here.
Increasing the resolution to 2k textures (2048x2048) doesn’t necessarily lead to a better result, as you can see here:
For convenience you can also download the original AVI file from here.
What I ended up doing is to bake 2k textures, but blur them (within Blender’s Node Editor and rendering with Compositing enabled). Using those results in this movie:

For convenience you can also download the original AVI file from here.
I think you can’t really see the differences very well on YouTube. If you really want to compare the resulting movie files, please download them via the links provided above (right click and save from there).
For convenience you can download the Blender file for the short animation and the baked 2k textures (already being blurred).
