Cycles, Blender’s internal GI renderer, provides a Sky Texture node to draw a background sky, using the Preetham or Hosek/Wilkie model.
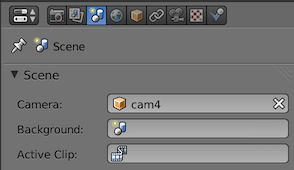
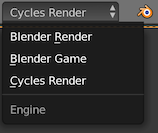
We have already a Blender scene in our repository, which we can use to test this node. After loading the scene into Blender we can switch to camera 4 (cam4) and to the Cycles render engine:
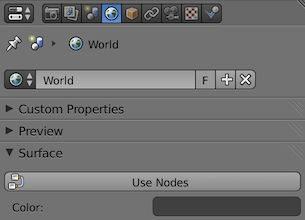
To be able to create a Sky Texture node we have to go to the world settings and press the Use Nodes button:
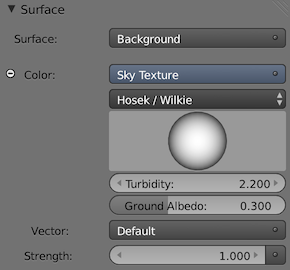
After that we will be able to select the Sky Texture as color input. What’s not so easy is to adjust the vector so the sky matches our sun light. Luckily someone provides a sun position extension to do exactly that.
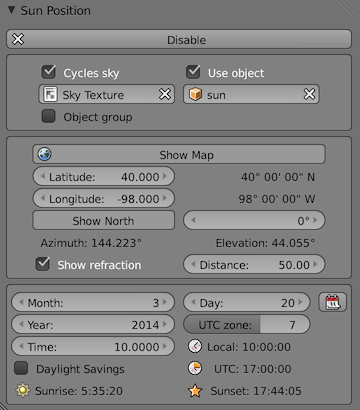
After installing the extension we should be able to enable the extension’s user interface under the Sun Position world settings and match Radiance’s gensky settings:
# gensky 3 20 10 -a 40 -o 98 -m 105
# Local solar time: 10.34
# Solar altitude and azimuth: 43.3 -35.4
# Ground ambient level: 14.6

void light solar
0
0
3 6.73e+06 6.73e+06 6.73e+06

solar source sun
0
0
4 0.421409 -0.593560 0.685639 0.5
...
So the first two parameters of the gensky command refer to the date (March 20th). The local time (10:00am) is the third parameter, and latitude and longitude follow (be aware of the negative value for the longitude setting).
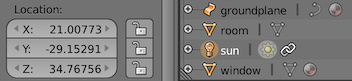
To double check that we set the UTC zone correctly we can compare the vector values from Radiance’s source statement (see above) with the sun location in Blender’s user interface (select the sun and check the transform settings). Because we did set up a constraint between the sun and the compass object, which resides in the origin, those values should match if we normalize the resulting vector (between the sun and the compass locations).
Obviously we would have to adjust all the materials in the scene as well to render with Cycles and compare against other GI renderers.
