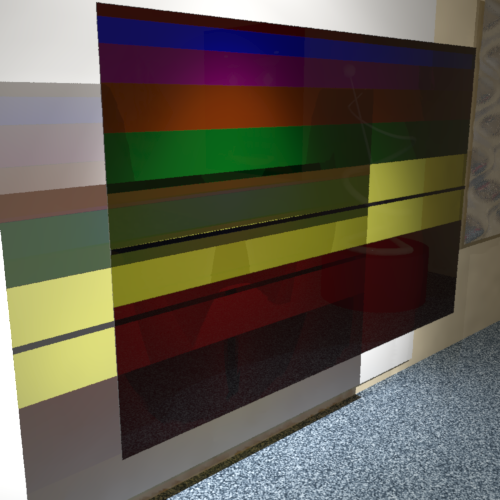
In chapter 3.5 of the Rendering with Radiance book an art gallery with a small lobby entrance and a showroom is described and rendered with Radiance. One piece within the showroom is a tapestry glass panel, which is shown below:
In the original Radiance scene the glass panels do not have a thickness, they are simply made by flat polygons:
...
dk_red_g polygon  l1
0
0
12	-3 	-2	-2
	3	-2	-2
	3	-2	-.5
	-3	-2	-.5
...
The modified Radiance scene in the GitHub repository uses volumes with a thickness (in this case 0.009 units):
...
!genprism dk_red_g l1 4 \
 -3  -2 \
  3  -2 \
	3  -.5 \
 -3  -.5 \
 -l 0 0 .009 | xform -rx 90 -t 0 -2 0
...
As you can see in the image below the glass panels are arranged in front of a white plaster and lit by 4 lights to cast colored shadows. Three lights are arranged in a row a little bit further away and a single light in front of the glass panels:
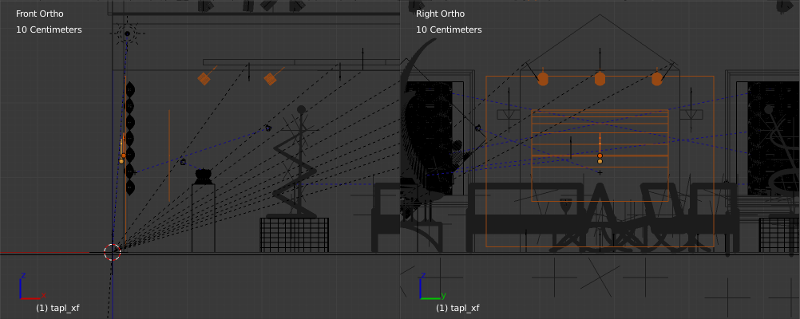
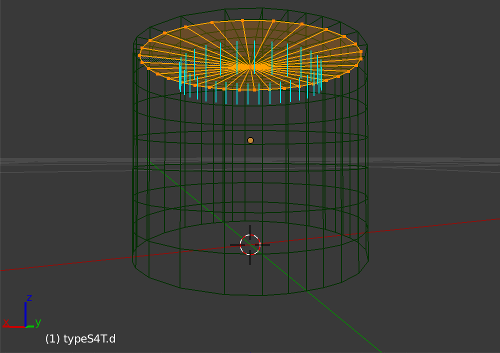
Each light is modelled as a cylinder with a closed top as the housing and a light emitting disk with the normals pointing downwards:
To render efficiently in Arnold only a few anti-aliasing samples were used (AA_samples), nodes for the sun&sky simulation (nodes physical_sky and skydome_light) were removed, no diffuse light bouncing was allowed (GI_diffuse_depth), and all other light emitters were turned off, by setting their standard shader emission values to zero:
...
options
{
...
 AA_samples 3
 AA_seed 1
...
 # background "sun_sky"
...
 GI_diffuse_depth 0
...
}
...
polymesh
{
 name MEtypeS4T.d
...
}

mesh_light
{
 name LAtypeS4T_light1
 mesh MEtypeS4T.d
 color 1 1 1
 intensity 5
 samples 3
}
...
standard
{
...
 emission 0 # 1
...
}
The light emitting disks used already a polymesh instead of a disk primitive, but to control the samples for each light we had to use a mesh_light instead of the standard shader with emission.
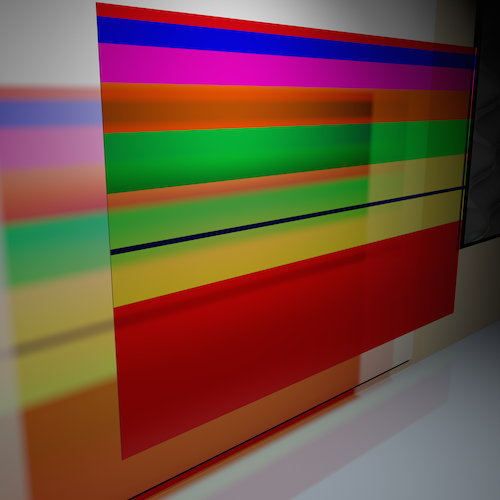
To achieve a good quality (and a relative short render time) for the 500x500 image shown above we used another trick by rendering four images in 2000x2000 resolution with different seed values (AA_seed), e.g. values from 1 to 4, and mixing the resulting images before scaling the final image down to 500x500. Here is the relevant part of a Makefile to achieve this:
...
# art_gallery_04

art_gallery_04.ass: art_gallery_04.patch
	patch art_gallery.ass -i art_gallery_04.patch -o art_gallery_04.ass

art_gallery_04.exr: \
art_gallery_04_seed_1.exr \
art_gallery_04_seed_2.exr \
art_gallery_04_seed_3.exr \
art_gallery_04_seed_4.exr
	echo "TODO: combine seed images into a single one"

art_gallery_04_seed_1.exr: art_gallery_04.ass
	$(KICK) -dp -dw -i art_gallery_04.ass -o art_gallery_04_seed_1.exr \
-set options.AA_seed 1 -r 2000 2000 -v 0

art_gallery_04_seed_2.exr: art_gallery_04.ass
	$(KICK) -dp -dw -i art_gallery_04.ass -o art_gallery_04_seed_2.exr \
-set options.AA_seed 2 -r 2000 2000 -v 0

art_gallery_04_seed_3.exr: art_gallery_04.ass
	$(KICK) -dp -dw -i art_gallery_04.ass -o art_gallery_04_seed_3.exr \
-set options.AA_seed 3 -r 2000 2000 -v 0

art_gallery_04_seed_4.exr: art_gallery_04.ass
	$(KICK) -dp -dw -i art_gallery_04.ass -o art_gallery_04_seed_4.exr \
-set options.AA_seed 4 -r 2000 2000 -v 0
...
Notice the syntax for overwriting the resolution and one of the parameter values (AA_seed) in the options node from the command line.
