Degree Elevation
Usage of a PySide6 Example
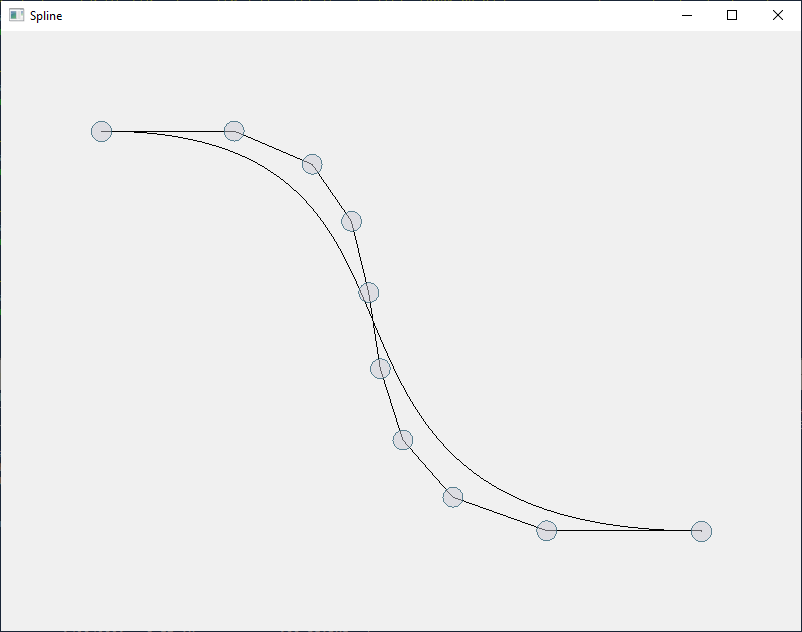
Before I go into any details about programming or the tools/libraries used, let’s look at the user interface of a simple program I wrote about Bezier Curves and Degree Elevation:
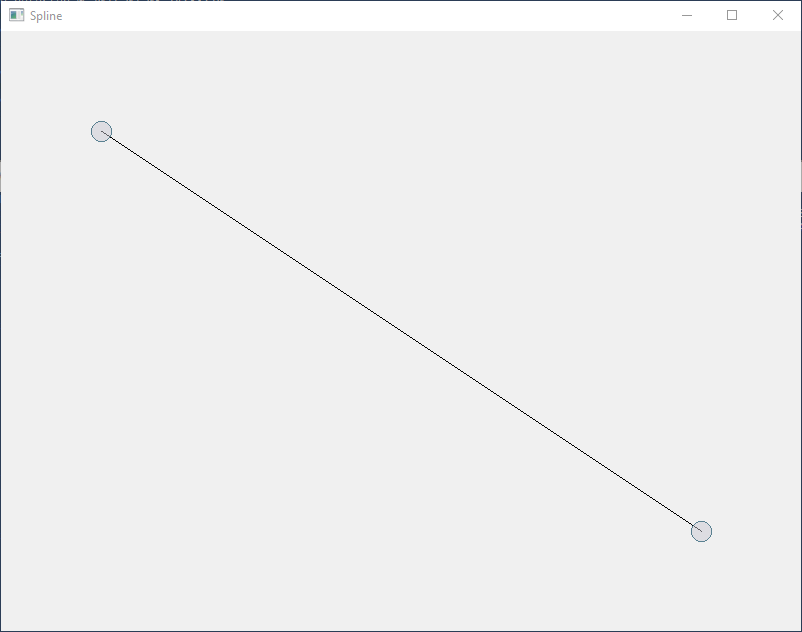
The programm starts with a simple line between two circles. The circles are kind of handles, because you can select them and move them around. Later we will refer to them as Control Vertices (or CVs).
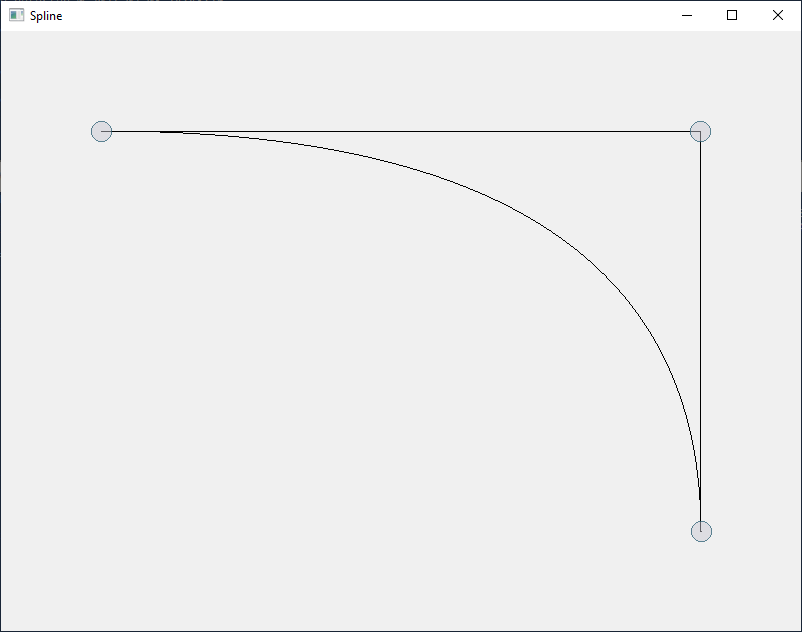
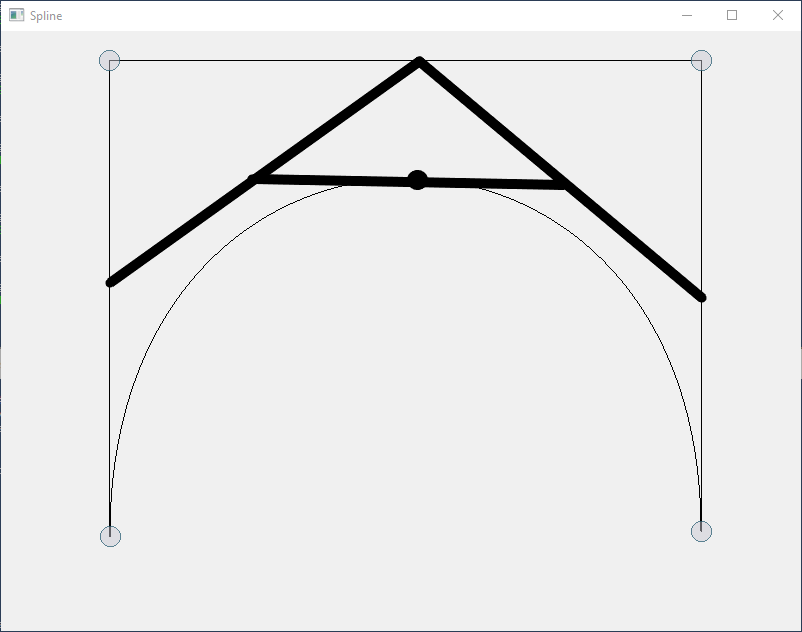
If we press the + key, we get a third handle or CV which I moved a
bit in the screenshot above to get a degree 2 Bezier curve.
Pressing + again will not change the shape of the curve, but
add another CV, so we have 4 CVs in total:
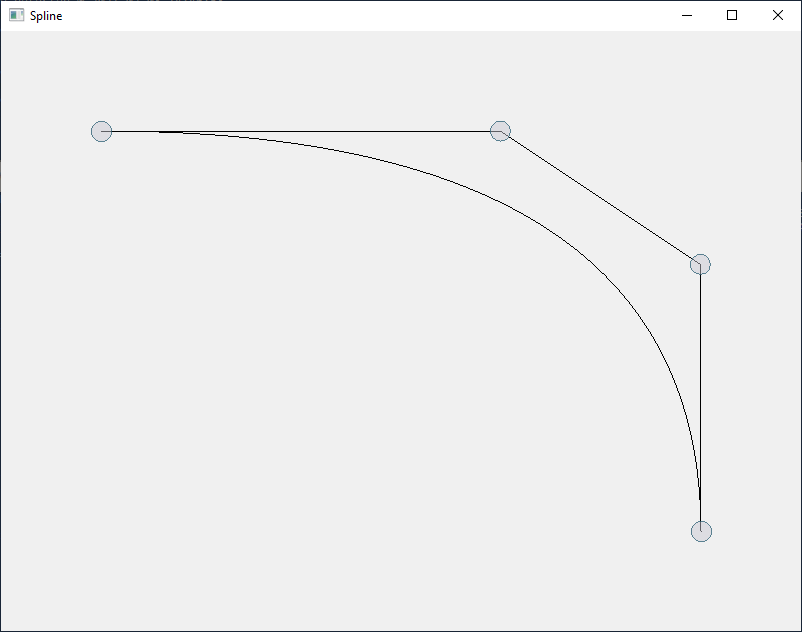
This algorithm to create an additional CV without changing the shape of the curve is called Degree Elevation.
Degree 3 curves are the most commonly used Bezier curves because they do have 4 CVs and that allows us to leave the plane and create real 3-dimensional curves. We also hear the term order a lot, which are simply the number of CVs you need to define a (order - 1) Bezier curve. Here we are not able to leave the plane (or canvas) but we can create a sine or cosine like curve:
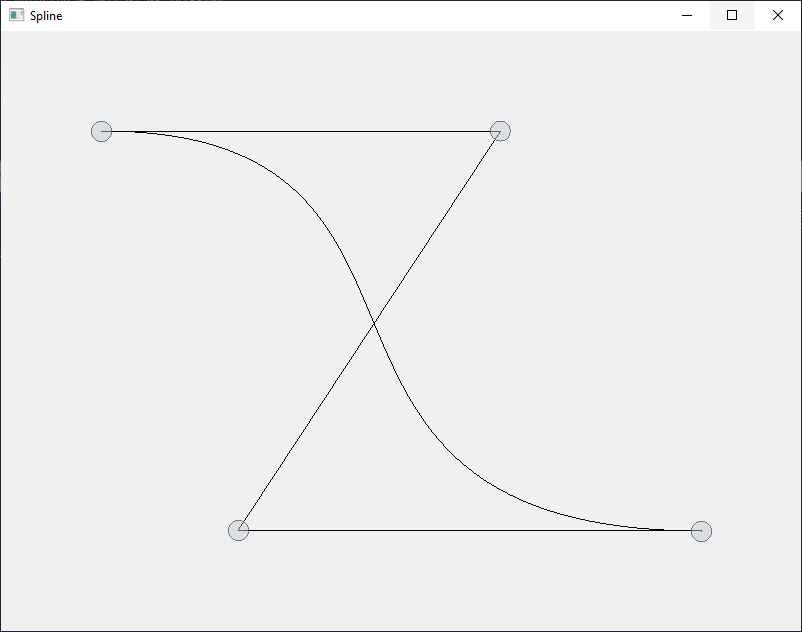
You could think about a hair rubber band which you would stretch and place over the four CVs (which could be e.g. pins on a pinboard) or connect all CVs with each other (instead of just connecting the consecutive CVs). That area covered by all four CVs can be called convex hull and Bezier (as well as B-Spline) curves (and surfaces) are known to be completely inside their convex hulls.
If you press + again and again until you end up with a Bezier curve
of order 10 you will notice that the polyline defined by
consecutive CVs is converging against the Bezier curve itself. You
could use that fact for example to judge how many points you would
need to calculate on a Bezier curve to always end up with a “smooth”
representation of the curve through many points of a polyline
(connected by tiny straight lines). You would degree elevate a couple
of times and calculate the length of the polyline (of the CVs) e.g. in
pixels on a screen.
The Python Code
I do not want to go into much details of the source code (written in Python), but I just want to mention that I used PySide6, which allows you to use the C++ library Qt from within the Python programming language.
        # draw path
        pen = QPen()
        painter.strokePath(path, pen)
        if len(self.points) >= 3:
            spline = QPainterPath()
            pen = QPen()
            d = 0.0
            for i in range(len(self.points) - 1):
                d += QLineF(self.points[i], self.points[i+1]).length()
            d = int(d / float(len(self.points) - 1))
            for i in range(d + 1):
                t = float(i) / float(d)
                p = bezier(self.points, t)
                if i == 0:
                    spline.moveTo(p)
                else:
                    spline.lineTo(p)
            painter.strokePath(spline, pen)
The code above creates a Qt pen, and draws a (painter) path (or polyline) by first moving the pen to the location of the first CV, calculating a bunch of points on a Bezier curve (defined by the CVs), and connecting those by drawing a line between two consecutive points.
        if key == QtCore.Qt.Key_Plus:
            # add new point
            if len(self.points) == 2:
                point1 = self.points[0]
                point2 = self.points[1]
                newPoint = (point1 + point2) / 2.0
                self.points.insert(1, newPoint)
We started with a simple line (Bezier curve of degree 1 or order
2). If we press the + key on the keyboard we simply divide the line
between both CVs and insert the new CV in the middle. Obviously this
will still look like a line until you move the middle CV.
            else:
                newPoints = []
                newPoints.append(self.points[0])
                degree = len(self.points) - 1
                for i in range(degree):
                    t = 1.0 - float(i + 1) / float(degree + 1)
                    newPoints.append(self.points[i] * (1.0 - t) +
                                     self.points[i+1] * t)
                newPoints.append(self.points[-1])
                self.points = newPoints
Doing this for higher order Bezier curves is only slightly more complicated. Based on the degree or order of the Bezier curve you start dividing consecutive lines between CVs, e.g. for the degree 2 curve above you divide the first line and place the new CV at 2/3 of the original distance. The new third CV will be 1/3 of the distance between the second and third CV of the original curve. You will end up with the four CVs shown above, defining a degree 3 curve with the same shape.
def bezier(points, t):
    cvs = points[:]
    while len(cvs) >= 2:
        newCvs = []
        for i in range(len(cvs) - 1):
            newCvs.append(cvs[i] * (1.0 - t) + cvs[i+1] * t)
        cvs = newCvs
    p = cvs[0]
    return p
Calculating a point on the Bezier curve (defined for a parameter t varying between zero and one) is pretty much a similar process. For calculating e.g. a point for t=0.5 on a degree 3 Bezier curve (using 4 CVs) you would divide the three lines (connecting the four CVs) in the middle. The newly created points get connected to two lines, divided again, so we create another line, and finally dividing that last line will calculate the point on the curve. This can be done in a similar way for any t between zero and one and any degree or order. Connecting many points calculated that way for e.g. t=0.1, 0.2, 0.3, …, 1.0 will approximate the curve by a polyline. If you choose the step small enough you will not see any straight lines anymore, because the distance between two consecutive points is about a pixel width.
The remaining source code can be found and studied here. In a future blog I will talk about calculating those points multi-threaded using another programming language, called Rust and how to mix Python and Rust, so Python can be used for the graphical user interface (using the Qt library), and Rust can be used for speeding up algorithms regarding Bezier, B-Spline, and NURBS curves and surfaces.
